
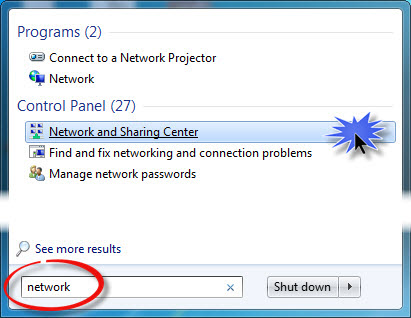
1. Open the Network and Sharing Center
Open the Start Menu and type “network” in the search box. Find and click the “Network and Sharing Center” link under the “Control Panel” heading.
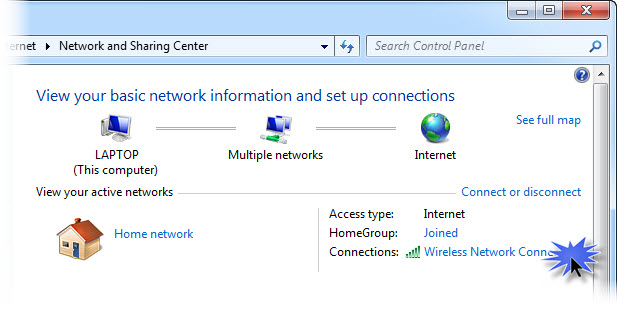
2. Open the Internet Connection Settings
Locate your “Internet” connection and click the link that says “Wireless Network Connection” or “Wired Network Connection”.
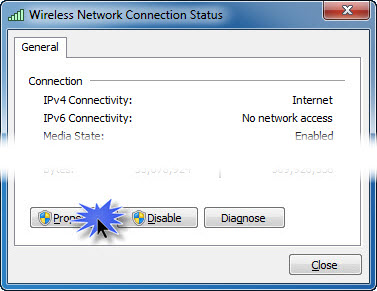
3. Open the Connection Properties
Click the “Properties” button.
3. Open the Connection Properties
Click the “Properties” button.
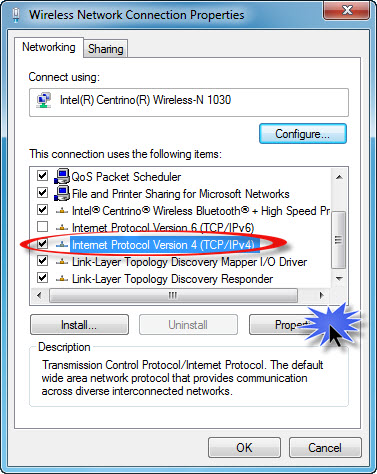
4. Open the TCP/IPv4 Properties
Locate the item in the list that reads “Internet Protocol Version 6 (TCP/IPv6)” and ensure that it is disabled (not checked).
Locate and select the item in the list that reads “Internet Protocol Version 4 (TCP/IPv4)”, then click the “Properties” button.
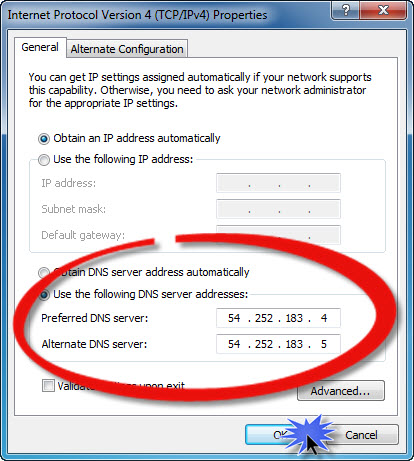
5. Update the DNS Servers
Click the radio button that says “Use the following DNS server addresses”, then enter the 2 DNS addresses as shown on the Overview page. Once complete, click the “OK” button.
Thats it! You should now be able to access (and sign up for) Netflix and Hulu Plus.
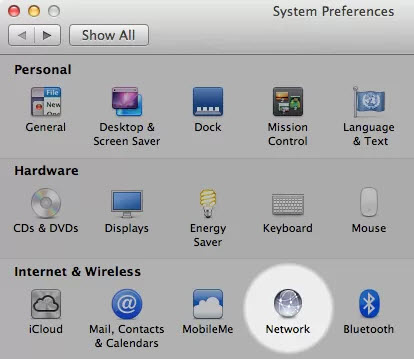
1. Open the Network Settings
From the Apple menu, select “System Preferences”, the window shown below should appear. Then click on the “Network” icon.
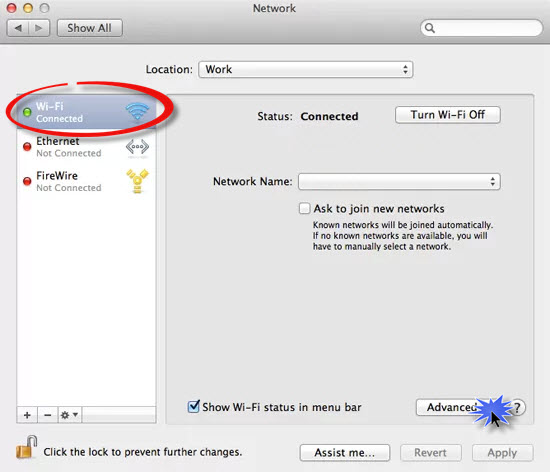
2. Select the Network Connection
Select your Network Connection. Choose “Wi-Fi” if you use wireless or “Ethernet” if you use a cable. Your current connection will have a green dot shown next to it. Click the “Advanced” button.
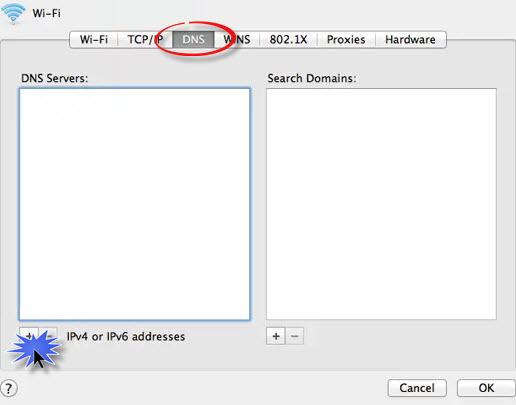
3. Add the DNS Servers
Select the DNS tab and click the “+” button then enter the 2 DNS addresses as shown on the Overview page. Use the “-” to remove the existing entries. Click “OK” when complete.
Thats it! You should now be able to access (and sign up for) Netflix and Hulu.
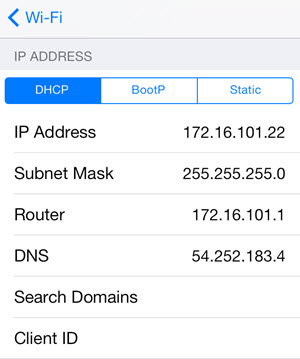
1. Change DNS Settings
From the iPhone or iPad Settings menu, select “Wi-Fi”. Select your Wi-Fi connection and update the DNS field with one of the addresses on the Overview page. If you enter more than one DNS server, be sure sure to separate the addresses with commas.
If you use multiple Wi-Fi connections, you will need update the DNS settings for each connection.
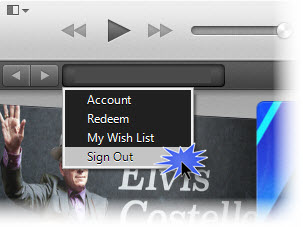
1. Prepare iTunes
Open iTunes on your computer, click “iTunes Store” then click on your account email and select “Sign Out” from the menu.
2. Change to the US Store
Scroll to the bottom right-hand corner of iTunes and click on the flag icon.

Then select the “United States” option from the list of countries.

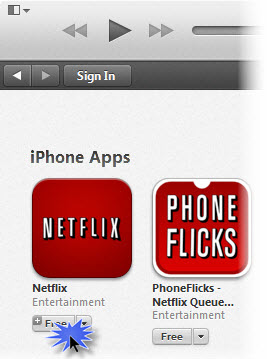
3. Find the Free Netflix App
The next step is to download a free app to bypass the usual credit card requirement when creating a new Apple ID. Search for “netflix” in the iTunes Store, then click on the free Netflix app.
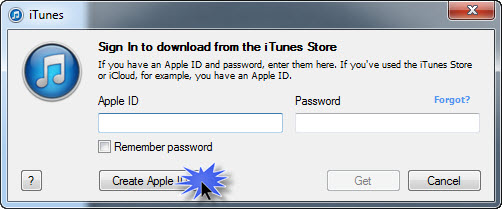
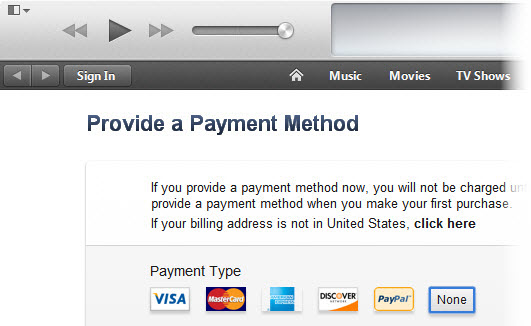
4. Create a New Apple ID
Click the “Create Apple ID” button and follow the prompts until you get to the “Apple ID Details” screen. Here, you will need to use a different email address to the one you are using for your regular Apple ID. Continue through to the payment screen.
On the payment screen select “None”, then enter a US billing address (any address will do) and click “Create Apple ID”. A verification email will be sent to your nominated email address and you will have to click on the link in it to activate your new account.
Once your new US iTunes account has been created, go to your iPad or iPhone, logout of your iTunes account and login to your new US iTunes account. Download the Netflix and Hulu Plus apps (and any other US apps) from the App Store.
When you have finished downloading apps, switch back to your regular iTunes account. Netflix and other apps downloaded with your US iTunes account will continue to work even when you’re logged in with your regular account.